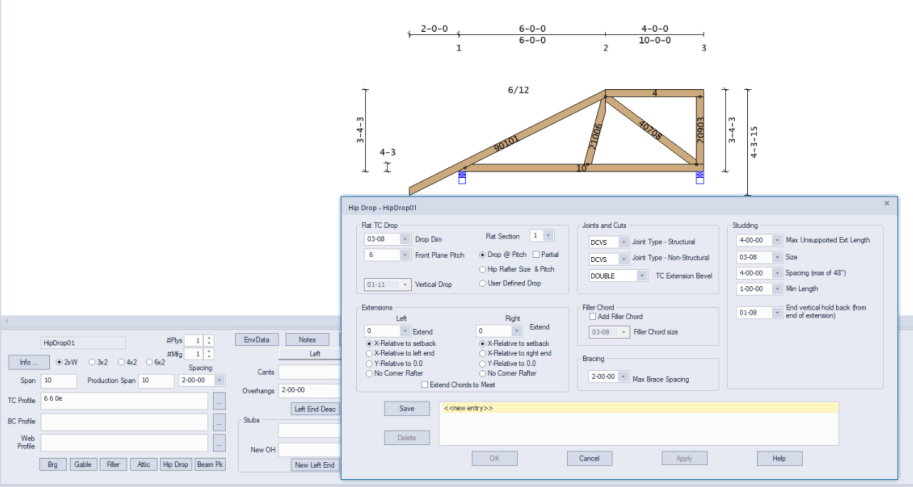
Purpose
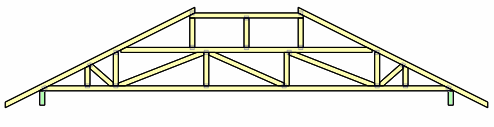
In hip drop trusses, the hip truss flat top chord is dropped by the plumb cut of the jack top chord at the roof pitch, or the hip rafter size, or a user-defined drop.
This feature also allows for the addition of a horizontal filler top chord between the top chord extensions and/or add studding below the extensions.
Steps

 Watch Video - Repetitive truss input
To create a Hip Drop:
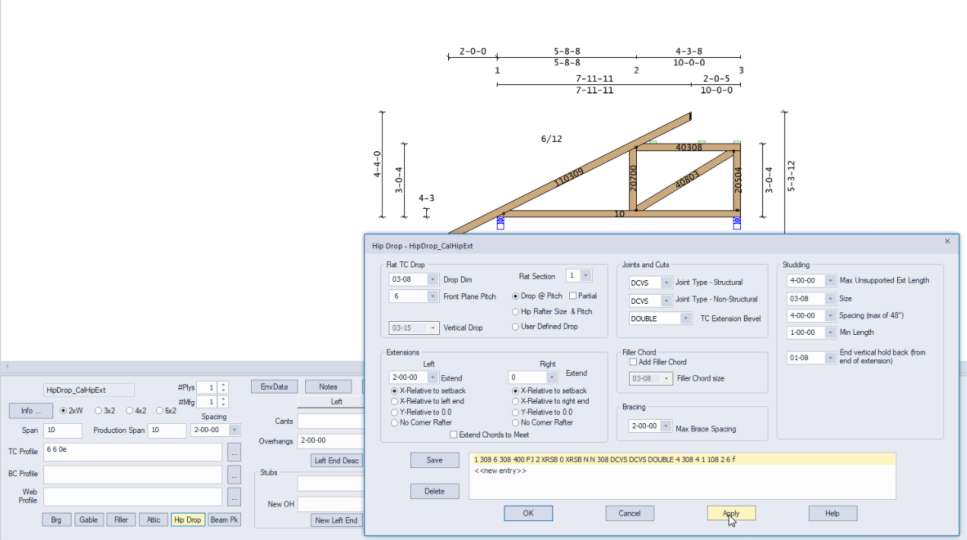
- From Truss - Design view, click Hip Drop. From Truss - Layout view, select Hip Drop from the Truss Modifications menu.
The Hip Drop window displays.
- Complete the appropriate options. To add multiple California hips without leaving the dialog box, click Save after each entry.
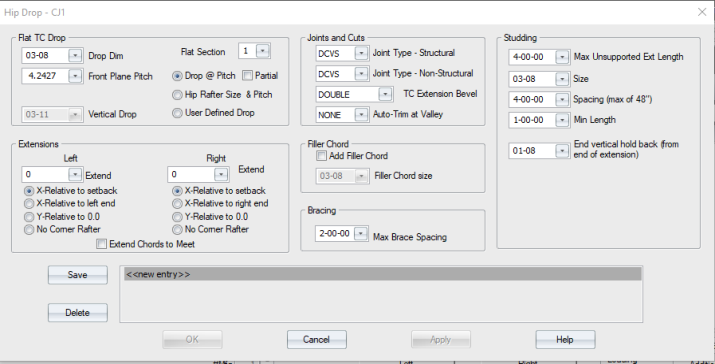
Flat TC Drop
- Drop Dim - select hip drop dimension
- Front Plane Pitch - select pitch of front plane
- Vertical Drop - top chord drop is automatically calculated, based on Drop Dim and Front Plane Pitch. If User Defined Drop is selected, you can manually define the amount to drop the top chord by selecting a value from the drop down list or entering a dimension
- Flat Section - defines which flat section the settings apply to. 1 is the left-most flat setting.
- Drop @ Pitch / Partial - select this option to define the Front Plane Pitch
- Hip Rafter size - define the amount to drop the top chord based on the size of the hip rafter by selecting a size from the drop down list or entering a dimension (this option displays only if Hip Rafter Size & Pitch is selected)
- User Defined Drop - select this option to use the size defined in the User Defined drop box. Note that the User Defined drop field becomes available only when this option is selected.
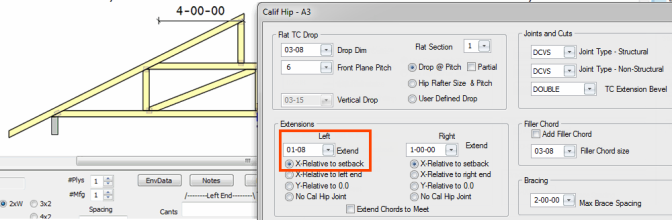
- Left/Right Extend - define the distance to extend the top chords from the hip shoulder by selecting a value from the drop down list or entering a dimension
- X-Relative to setback - select this option if the extension is to be measured horizontally from the setback
- X-Relative to left end - select this option if the extension should be measured horizontally from the left end of the truss
- Y-Relative to 0.0 - select this option if the extension should be measured vertically from the left end of the truss
- No Corner Rafter - if this option is unchecked, corner jacks do not extend to the peak
- Extend Chords to Meet - check this box to extend top chords from the shoulders until they intersect
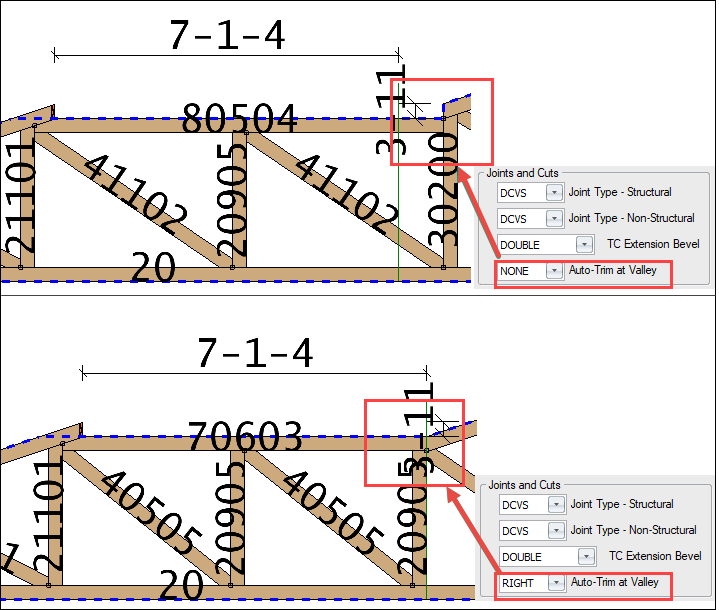
Joints and Cuts
- Joint Type - Structural - Select the type of structural joint:
- Joint Type - Non-Structural - Select the type of non-structural joint:
- DCVS - Double Cut, Vertical under Slope
- SCVS - Single Cut, Vertical under Slope
- SCVF - Single Cut, Vertical under Flat
- TC Extension Bevel - Select the type of bevel cuts at the end of the TC extension:
- None
- Single Front
- Single Back
- Double
You can add a non-structural filler chord above the top chord of the hip as an intermediate way to support the top chord of the end jacks running over the top, without having to raise the structural chord.
- Add filler chord - check this box to add a flat cosmetic member above the flat top chord
- Filler chord size - define the size of the filler chord by selecting a size from the drop down list or entering a dimension
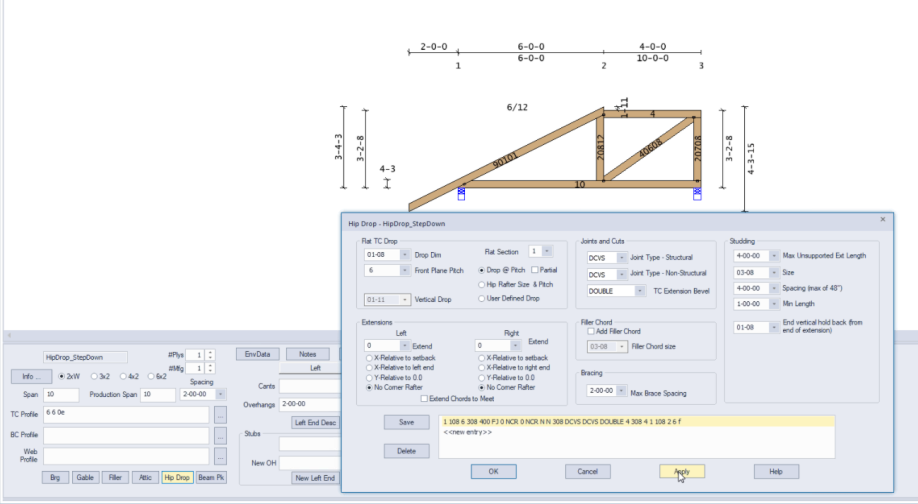
Note: When filler is used, it generally works as follows:
- Hip girder designed with appropriate drop
- Hip just behind the girder, designed as a 1-ply of the same profile as the hip girder, with 2’ extensions
- Hip next, designed just like the #2 hip but with a 4’ extension and a secondary chord to support the end jack TC’s (4’ o.c. is the max. unsupported for end jacks)
- Hip next, designed just like the #2 hip but with a 6’ extension, a vertical at 4’ on the extension, and no secondary chord
- Hip next – new profile (structural chord raised up)
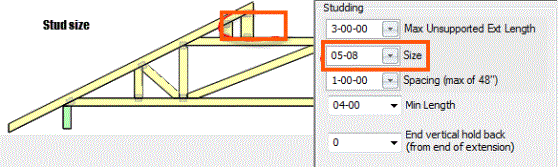
- Max Unsupported Ext Length - define the maximum length of extensions before studs are added by selecting a value from the drop down list or entering a dimension
- Size - define the size of the studs by selecting a nominal size from the drop down or entering a dimension
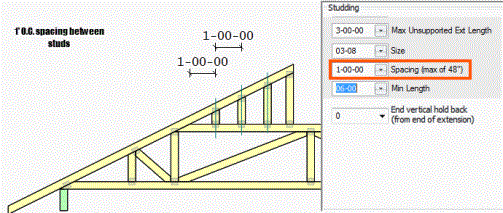
- Spacing (max of 48") - define the on-center spacing between the studs by selecting a value from the drop list or entering a dimension
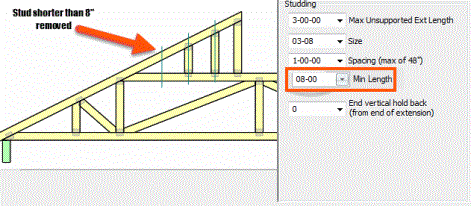
- Min Length - define the length of short studs to be removed by selecting a value from the drop down list or entering a dimension. Studs shorter than the dimension entered are not displayed or added to the cut list.
- End vertical hold back - hold back the last vertical from end of extension by selecting a value from the drop down list or entering a dimension
- Click Apply to apply your changes and keep the window open. Click OK to apply your changes and return to the Design view.
No drop
Drop with Step Down
Drop California Hip - no extension
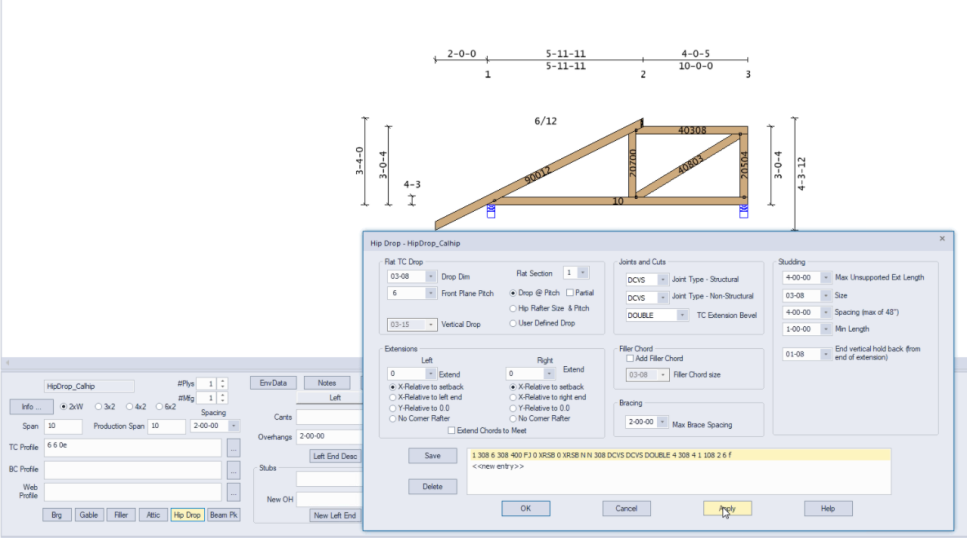
Drop California Hip - with extension